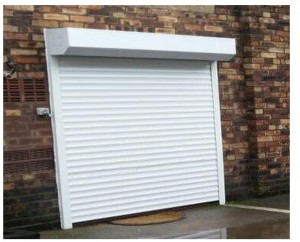
Have you ever wanted to add a unique touch to your home decor? Roller shutters are a great addition that not only enhance aesthetics but also provide privacy and protection. Making roll up doors can seem like a daunting task, but with the right tools and a little patience, you can create something beautiful and functional. In this blog post, we’ll guide you through the process of making your own roller shutter.
Step 1: Gather Materials
Before starting a project, it is very important to gather all the necessary materials. You will need:
1. Wooden planks: Choose a high-quality wooden plank that fits your desired size and style. Choose durable materials like cedar or pine.
2. Router: A router will help you create smooth edges and intricate designs on wood.
3. Hinges and screws: Choose sturdy hinges that can hold the weight of the door. Make sure to choose screws that are the right size and strength for your door.
4. Paint or Stain: Choose a finish that matches your interior design preferences. Paint or stain the wood before assembling the door.
Step 2: Measure and Cut the Wood
Measure the dimensions of the door frame to determine the size of the rolling door. Make sure to leave enough room for the hinges. Once you have your measurements, cut the board accordingly with the saw.
Step 3: Create the shutters
Use a router to score evenly spaced vertical lines on the board to make the shutters. The size of the blinds depends on your preference, but a common width is about 2 inches. Make sure all lines are straight and aligned.
Step Four: Assemble the Roller Door
Lay the cut boards side by side, making sure there is an equal gap between each board. Use screws to secure them together firmly. Next, attach the hinges to the door frame and roll-up door, making sure they support the weight and allow the door to swing smoothly. Test the movement of the door to ensure it opens and closes seamlessly.
Step 5: Finishing touches
Now is the time to put the finishing touches on your roller door. Sand away any rough edges or imperfections. Apply your paint or stain of choice and allow the wood to dry completely between coats. This will protect the wood and enhance its appearance. You can also add decorative accessories such as handles or knobs to further personalize your shutter.
By following these steps, you can create a stunning roll-up door that will add a touch of elegance to your space. Remember to take your time, measure accurately, and prioritize safety when undertaking this project. Your hard work and attention to detail will undoubtedly result in a beautiful and functional roller door that you can proudly display in your home.
building a roller shutter may seem challenging, but with the right tools, materials, and guidance, it can be a rewarding project. Whether you’re looking to add character to your room or add privacy, handcrafted roller shutters are a great choice. So roll up your sleeves, unleash your creativity, and start building your very own roll up doors today!
Post time: Jul-28-2023

